Tuesday, 8 March 2011

Pendraken Competition Results

Some really amazing winnners in the Pendraken 10mm painting comp. Anyone interested in grand scale models should check out the winners thread on their forum here.

My chariot entry was accepted into the comp even though it was a few minutes past the deadline (thanks!) but sadly didn't win a prize. There were 5 judges who gave 3/2/1 rankings for their favourite entries and in the vehicle category there were 11 different entries all polling at least 1 point! So a really spread field. The winner was some way out in front

 Camouflaged Sherman, by fred12df
And then the other entries were all really close apparently, with this one sneaking into 2nd place.
Sci-Fi Marines APC, by kassad
What they have now done is all entries that received at least 1 vote by the judges have been placed into a community vote and my chariot made it through! So it got at least a bit of love from the judges!
My Chariot
Shame I couldn't get the composite picture done in time, especially as it seemed so tight for 2nd place and the more detailed shots could have sneaked me over the line, but definitely need to make sure next time there is a competition I leave plenty of time for sorting out the pictures. If you are a member of the Pendraken forum you can vote for the "people's choice" on this thread. No pressure to support my entry. ;)

Monday, 7 March 2011

Infinity Competition Entry

I managed to get another Infinity miniature painted for a competition on the official forum for the game. The competition is simply for the best painted mini as voted for by the forum community. It is a pretty tough crowd and even when just posting pictures of minis on the forum you are doing VERY well if you get any serious positive feedback. A lot like the "Cool Mini or Not" site.

Last time I looked among public votes I was languishing back somewhere around 10th out of 18 entries. The top three get a prize of some new terrain from Microarts Studios for Infinity.

This is my entry as a composite image. Its a fairly big picture, so click on it to enlarge.


This fella is a Wu Ming from the Yu Jing faction in the game. The base is a custom one made from a bit of plasticard for a pavement and a drain-cover from the GW 40k basing kit.

He was mainly painted with Vallejo paints. I used a very light grey colour to paint the white and then shaded it with thinned GW's Badab Black wash just in the recesses. And then basically water with a very small amount of BB wash in to shade/wash all the "white" areas. It was then tidied up with more of the base colour in many very thin layers. Before highlighting the raised areas with more of the base colour and finally a few thin layers of Vallejo gloss white.

What I've effectively done is used the thin layers of grey to make the faint wash underneath show through progressively more towards the recesses. This way you can shade the white, but also it keeps the finish smooth. Too often its easy for white to look grainy or rough and this avoids that.

For the gun I'm painting all my Infinity models without metallic paints; its not "Non-metallic Metal" as I'm not trying to paint it like metal, but instead like reflective plastics, or painted surfaces. To do this I just use very thin paint to give nice blended layers with final, quite bright highlight lines on edges.

Any questions, or if you like it, please drop me a comment below.

Sunday, 6 March 2011

Realistic Verdigris - A Tutorial

There seems to be a bit of a trend in Games Workshop painting at the moment for using verdigris on anything they can. For those of you not familiar with the term it is the greenish tarnish that appears when copper (or any copper-alloy) oxidises. It is the same effect as silver tarnishing, or iron rusting. I believe if you want to paint something properly you need to understand it first, so this post will explain the Chemistry behind the effect, and the resulting colours, and then look at a technique I've developed for getting quick convincing results.

From Wikipedia (its OK, we're only after generalisations, its not a scientific paper!) "Verdigris is a complex chemical mixture of compounds, complexes and water. The primary components are copper salts of acetate, carbonate, chloride, formate, hydroxide and sulfate. The secondary components are other metallic salts, acids (organic and mineral), atmospheric gases and water. All the components are in an ever-changing and extremely sophisticated electrochemical reaction equilibrium that is dependent on the ambient environment."

So its enough to say oxidisation is a complex process for copper due to the different copper compounds which have different colours. Therefore the actual colour of verdigris will vary depending on conditions. I'm going to lay out some very general principles to help choose the right colour.

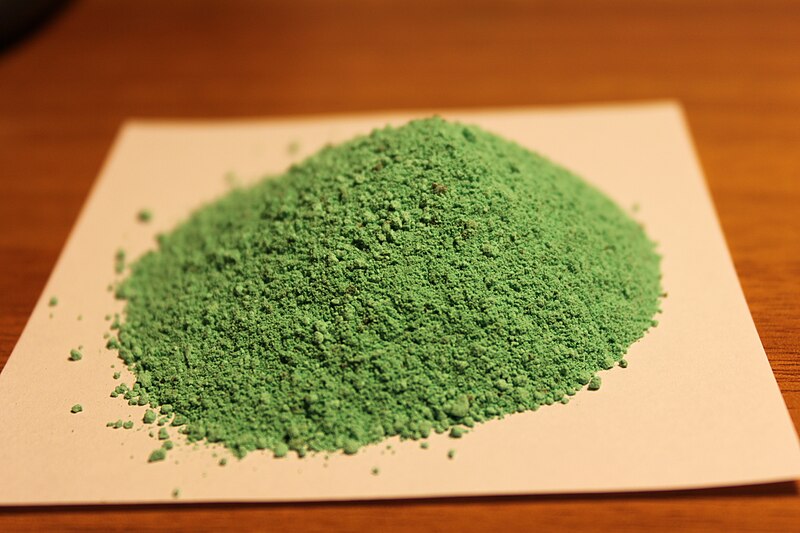
The main component is Copper(II) Carbonate, which is the characteristic light green colour. This will be your starting point for verdigris representation.

Copper (II) Carbonate
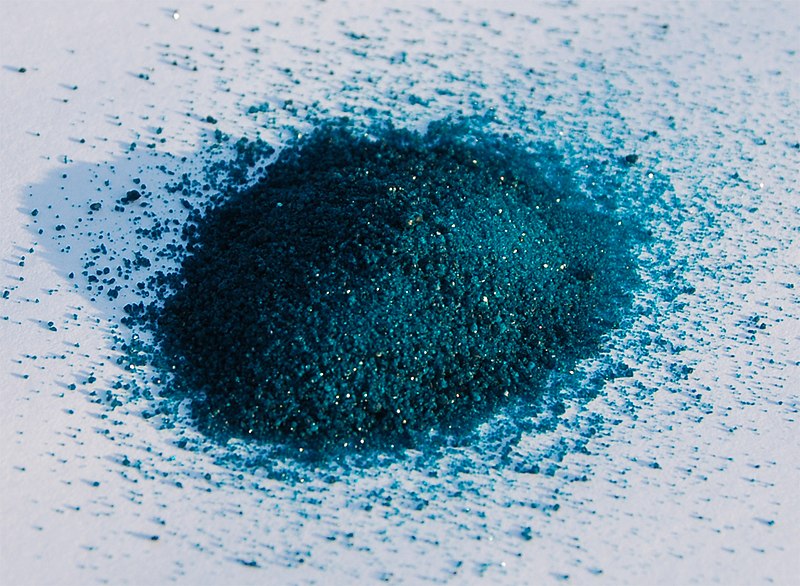
If the copper/brass is on a ship's instruments etc and exposed to salt water it can instead be Copper (II) Chloride. This is interesting as Copper (II) Chloride is a brown colour, but as it absorbs moisture it becomes Hydrated Cooper (II) Chloride which is a bright green colour. So depending on how old it is it will likely get more vivid.
Anhydrous Copper (II) Chloride
Hydrated

A darker green component is Copper (II) Acetate, which is formed in the presence of acetic acid, which is present in small quantities in fruit, particularly fermented, or over-ripe fruit, but also vinegar.

Copper (II) Acetate
Finally of interest is what happens when Copper (II) Carbonate is heated. if exposed to temperatures of ~300oC it turns to Copper (II) Oxide and this is pretty much black.


So to put this into practice; if we were weathering a brass cannon we would want a grass green colour, but blackened near the mouth of the cannon, and near the fuse. If that cannon is on a ship it would be a much brighter green, and if the cannon was on the walls of an industrial city it may be darker.

Games Workshop in their tutorials almost always use a thinned down mix of Hawk Turquiose and Dark Angel Green, which I think looks a little flat and unrealistic. As a general rule I like to use pigments for weathering, rather than thinned washes as the end texture is much better and you naturally get irregular application which looks less contrived. MIG & Forgeworld are two notable manufacturers of pigments, but most of their ranges focuses on mud, dust and rust. Originally modellers used artist's pigments/pastels for weathering, so I have returned to this principle and I have a stick of soft pastel pigment from Hobbycraft (~99p) - #165 from Faber Castell.

I scrape a small amount into a palette with a knife blade so it is a fine powder and then mix with MIG thinner for washes.


Then wash this around the brass/copper component that needs weathering. The painted surface means the thinner will flow around recesses by capillary action. The thinner can be used to control the thickness of the application and hence the final colour. By adding more neat thinner to the model you can "lift" off some of the pigment, or spread it around, making it more or less translucent.

I should point out, although specially designed thinner gives a good result, other thinners such as ordinary water, water mixed with dishwasher rinse aid, turps etc can all serve fine.

I believe for a single application technique this gives much better results than washing with thinned paints. These Mantic skeletons have had their telescopes painted with GW Shining Gold mixed 2:1 with GW Scorched brown. Highlighted with a quick drybrush and then weathered using this technique.


You can hopefully see in this last picture (especially if you click to look at the full size version) the different finishes you can get by just applying the pigment thicker (Right).

Obviously there are a number of pastel greens available and by mixing these along with black or brown (either modelling pigments or pastels) different effects such as the previously mentioned "marine verdigris" would be achievable.

I should say this technique is probably only suitable for table-top standard painting, where it has advantages over washes, but for display models a more involved technique would probably be best. I understand Vallejo do a range of washes for representing verdigris, which involves 4-5 stages of different coloured washes, but I think that is probably not justified for basic minis.

Let me know if you've found this tutorial useful - comments are the lifeblood of a blog!

Thanks. Simon

Tuesday, 1 March 2011

Ancient British Chariot

I thought I would put up a collage photo of the British Chariot I painted; this is what broke my computer yesterday..

It's pretty big, so click on it to expand the image.

Please leave a commend with any feedback, or if you just like it!

Monday, 28 February 2011

Pendraken Failure

It would probably be fair to say I am not best pleased with my computer at the moment. Having worked to finish off entries for two of the categories in Pendraken's Feburary painting comp, I boot up the computer with half-an-hour until deadline....

And rather predictably it goes a bit nuts. It has now been over 1 1/2 hours and it is still chuntering away about something. So I have missed the competition deadline and the moral of the story is get your entries in early for things and always, ALWAYS have a brick handy to beat some respect into your computer.

Bit disappointed to say the least as I felt I'd put together a couple of nice entries. I've put the pictures up here for you to have a look at, certainly my best work in 10mm I feel.

I'll probably write some more about the failed entries soon. Colour schemes etc.

Saturday, 19 February 2011

Grand Scale Gaming show

There's been a few bits of news on Table Top Gaming news about a new show coming the South West this year for grand scale gaming.

Called "SMS" and run by Angel Barracks it appears to be catering primarily to 6mm at the moment, but in their spiel they talk about 10mm and sub-3mm, however as yet there are no traders or games confirmed for these scales. Also so far it all appears to be Ancients and Napoleonics with one Alt-WW2 demo-game.

It's being held over in Bristol on August 14th and if they can get a few more traders and interesting looking games I may well give it a look. I'll keep an eye on their pages and add an update if it looks like really taking off.

Wednesday, 2 February 2011

Learning photoshop

A bit of a departure for the blog this time. I've managed to get a copy of corel paint shop pro through work and I've been trying to learn how to use it. One of the things I really wanted to be able to do was combine two or more photos of the same miniature into a single image. You often see these on proper blogs and painting sites so I thought I'd see if I could do the same.

It proved a bit tricky on my old computer, but I've attached my first attempt. I'm going to use this technique to make composite images for entry into the Pendraken painting competition, in order to get more views of the same thing into my entry.
Tiger Soldier
This is a miniature I painted for the Corvus Belli game Infinity, which is a 28mm skirmish game. This guy is a Tiger Soldier. The composite image is seriously large, so I recommend clicking on it where you'll be able to see the figure in excruciating close-up! (And see all my mistakes!!) I'll probably post up some more photos of a few Infinity figures I've been working on as well as my Mantic kings of war figures, which have been seriously distracting me from Warmaster.

However, never fear, there are Carthaginian Heavy Cav, Roman Auxiliary bowmen and Roman Auxiliary cavalry in the pipeline, as well as my Pendraken painting comp entries.