From Wikipedia (its OK, we're only after generalisations, its not a scientific paper!) "Verdigris is a complex chemical mixture of compounds, complexes and water. The primary components are copper salts of acetate, carbonate, chloride, formate, hydroxide and sulfate. The secondary components are other metallic salts, acids (organic and mineral), atmospheric gases and water. All the components are in an ever-changing and extremely sophisticated electrochemical reaction equilibrium that is dependent on the ambient environment."
So its enough to say oxidisation is a complex process for copper due to the different copper compounds which have different colours. Therefore the actual colour of verdigris will vary depending on conditions. I'm going to lay out some very general principles to help choose the right colour.
The main component is Copper(II) Carbonate, which is the characteristic light green colour. This will be your starting point for verdigris representation.
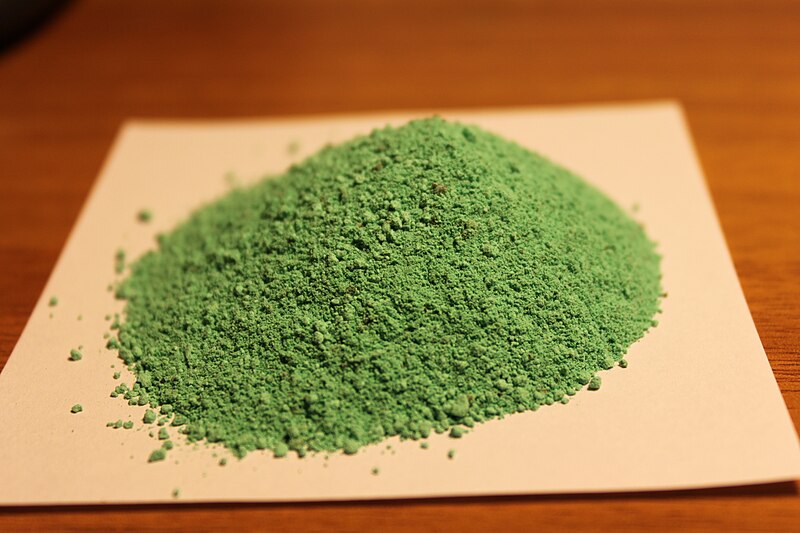 |
| Copper (II) Carbonate |
 |
| Anhydrous Copper (II) Chloride |
 |
| Hydrated |
A darker green component is Copper (II) Acetate, which is formed in the presence of acetic acid, which is present in small quantities in fruit, particularly fermented, or over-ripe fruit, but also vinegar.
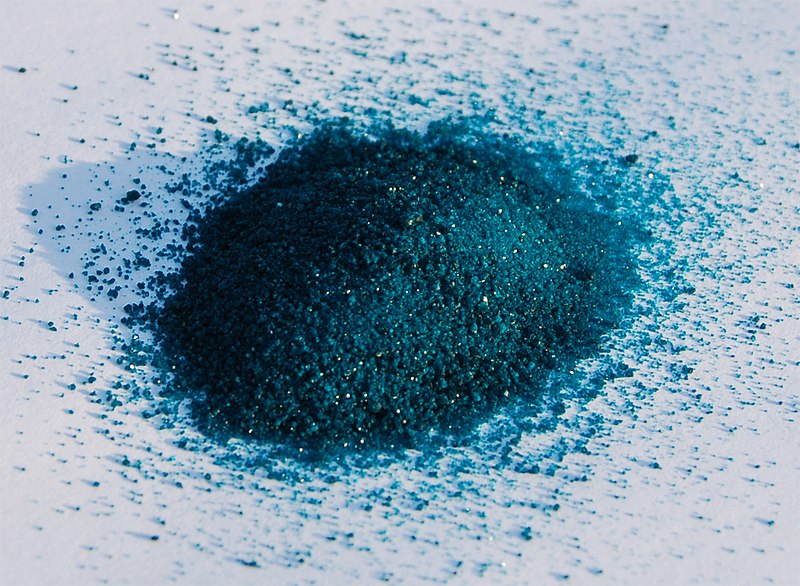 |
| Copper (II) Acetate |

So to put this into practice; if we were weathering a brass cannon we would want a grass green colour, but blackened near the mouth of the cannon, and near the fuse. If that cannon is on a ship it would be a much brighter green, and if the cannon was on the walls of an industrial city it may be darker.
Games Workshop in their tutorials almost always use a thinned down mix of Hawk Turquiose and Dark Angel Green, which I think looks a little flat and unrealistic. As a general rule I like to use pigments for weathering, rather than thinned washes as the end texture is much better and you naturally get irregular application which looks less contrived. MIG & Forgeworld are two notable manufacturers of pigments, but most of their ranges focuses on mud, dust and rust. Originally modellers used artist's pigments/pastels for weathering, so I have returned to this principle and I have a stick of soft pastel pigment from Hobbycraft (~99p) - #165 from Faber Castell.


 I scrape a small amount into a palette with a knife blade so it is a fine powder and then mix with MIG thinner for washes.
 Then wash this around the brass/copper component that needs weathering. The painted surface means the thinner will flow around recesses by capillary action. The thinner can be used to control the thickness of the application and hence the final colour. By adding more neat thinner to the model you can "lift" off some of the pigment, or spread it around, making it more or less translucent.
I should point out, although specially designed thinner gives a good result, other thinners such as ordinary water, water mixed with dishwasher rinse aid, turps etc can all serve fine.
I believe for a single application technique this gives much better results than washing with thinned paints. These Mantic skeletons have had their telescopes painted with GW Shining Gold mixed 2:1 with GW Scorched brown. Highlighted with a quick drybrush and then weathered using this technique.


You can hopefully see in this last picture (especially if you click to look at the full size version) the different finishes you can get by just applying the pigment thicker (Right).
Obviously there are a number of pastel greens available and by mixing these along with black or brown (either modelling pigments or pastels) different effects such as the previously mentioned "marine verdigris" would be achievable.
I should say this technique is probably only suitable for table-top standard painting, where it has advantages over washes, but for display models a more involved technique would probably be best. I understand Vallejo do a range of washes for representing verdigris, which involves 4-5 stages of different coloured washes, but I think that is probably not justified for basic minis.
Let me know if you've found this tutorial useful - comments are the lifeblood of a blog!
Thanks. Simon


