Showing posts with label terrain. Show all posts

Wednesday, 24 August 2011

Dark Age Buildings

I bought four buildings from a company called Total Battle Miniatures a while back and have got some paint on them now


This picture is of the "Great Hall" and a small wattle and daub dwelling. I've also got a 2nd dwelling and a "workshop" which is about half-way between the sizes of these two. The Great Hall is definitely the star of the show and will make a great centre-piece for a game.


Even though they are sold as Dark Ages, I don't see any reason why they couldn't be used for Late Roman, Northern Europe setting and possibly the workshop and dwellings all the way through to ~1600AD. As I understand it the Romans in Britain encouraged the move away from round houses to rectangular ones, so I'm happy to sub these in for a game of Gallic types against Imperial Romans as a rebellion or something.

On to the buildings themselves - they are not too expensive and I think they are worth it for the cost. I bought them from Maelstrom Games; unlike most MG stock they are not discounted normally, but I waited for one of their frequent 16% off vouchers and bought them then. So it was Great Hall - £6.75; Workshop - £4.20; Dwellings - £2.10. The resin casting quality is not too bad, but there are some problems with bubbles up around the eves of the thatch and the base of the buildings.

On balance I'd recommend them though. A nice quick way to populate a 10mm table.

Sunday, 5 September 2010

Silflor Grass Tufts

I've been looking for a way to liven up the arid/desert bases for my Carthage force for a while now, and I've toyed with the idea of using dead static grass that is a pale yellow colour, to make the bases look a little less like a sand desert.

However in the end I've decided to give Silflor grass tufts a go. These are strips of random clumps of static grass, designed to look like natural tufts of grass. I decided to try a couple of small packs which retail for about £3.70 a box. I wasn't sure exactly how much you get for that, so I've photographed the contents with a couple of 10mm figures.

These are 2mm or "short" tufts and are a good fit for 10mm scale. The strips are double sided, so you do get a fair number of tufts. As you can see on the cutting mat, it comes to about 15cm x 10cm.

The tufts themselves are irregularly shaped and the grass seems to be bonded to a flexible glue that stays lightly tacky. They can be pulled apart to make smaller tufts as well without noticeably damaging the appearance of the grass. I've used tacky glue to attach mine to the bases.


As you can see the grass is maybe too much of a good match for my arid base scheme! It does make the bases look more interesting in real life though and certainly achieves the look I was going for of a parched land rather than total desert.

Would I recommend these? Probably only for very specific jobs/projects. They give a better finish and more control over placement than static grass and glue, but they are more pricey. I can definitely see the benefits of the larger tufts for dioramas and larger show-piece models, but for my 10mm projects they are not going to replace static grass for basing grass-land figures.

Sunday, 22 August 2010

Warmaster Hedges

Ok, the promised hedges tutorial.

With defended terrain offering possibility in Warmaster of even the humblest infantry holding off a cavalry charge (it reduces "to hit" rolls from 4+ to 5+), it's important to have a variety of defensible terrain in your collection.

N-Gauge railway models are a great source of terrain, and I have bought some dry stone walling designed for model train layouts for my collection. However although nice, it does tend to come at a price, and almost always need further painting etc as well (as model train companies don't seem to go in for using painting to enhance scale, things tending to be monotone). For those people looking to save money and not spend ages making terrain, short cuts and nifty tricks using cheap items are great.

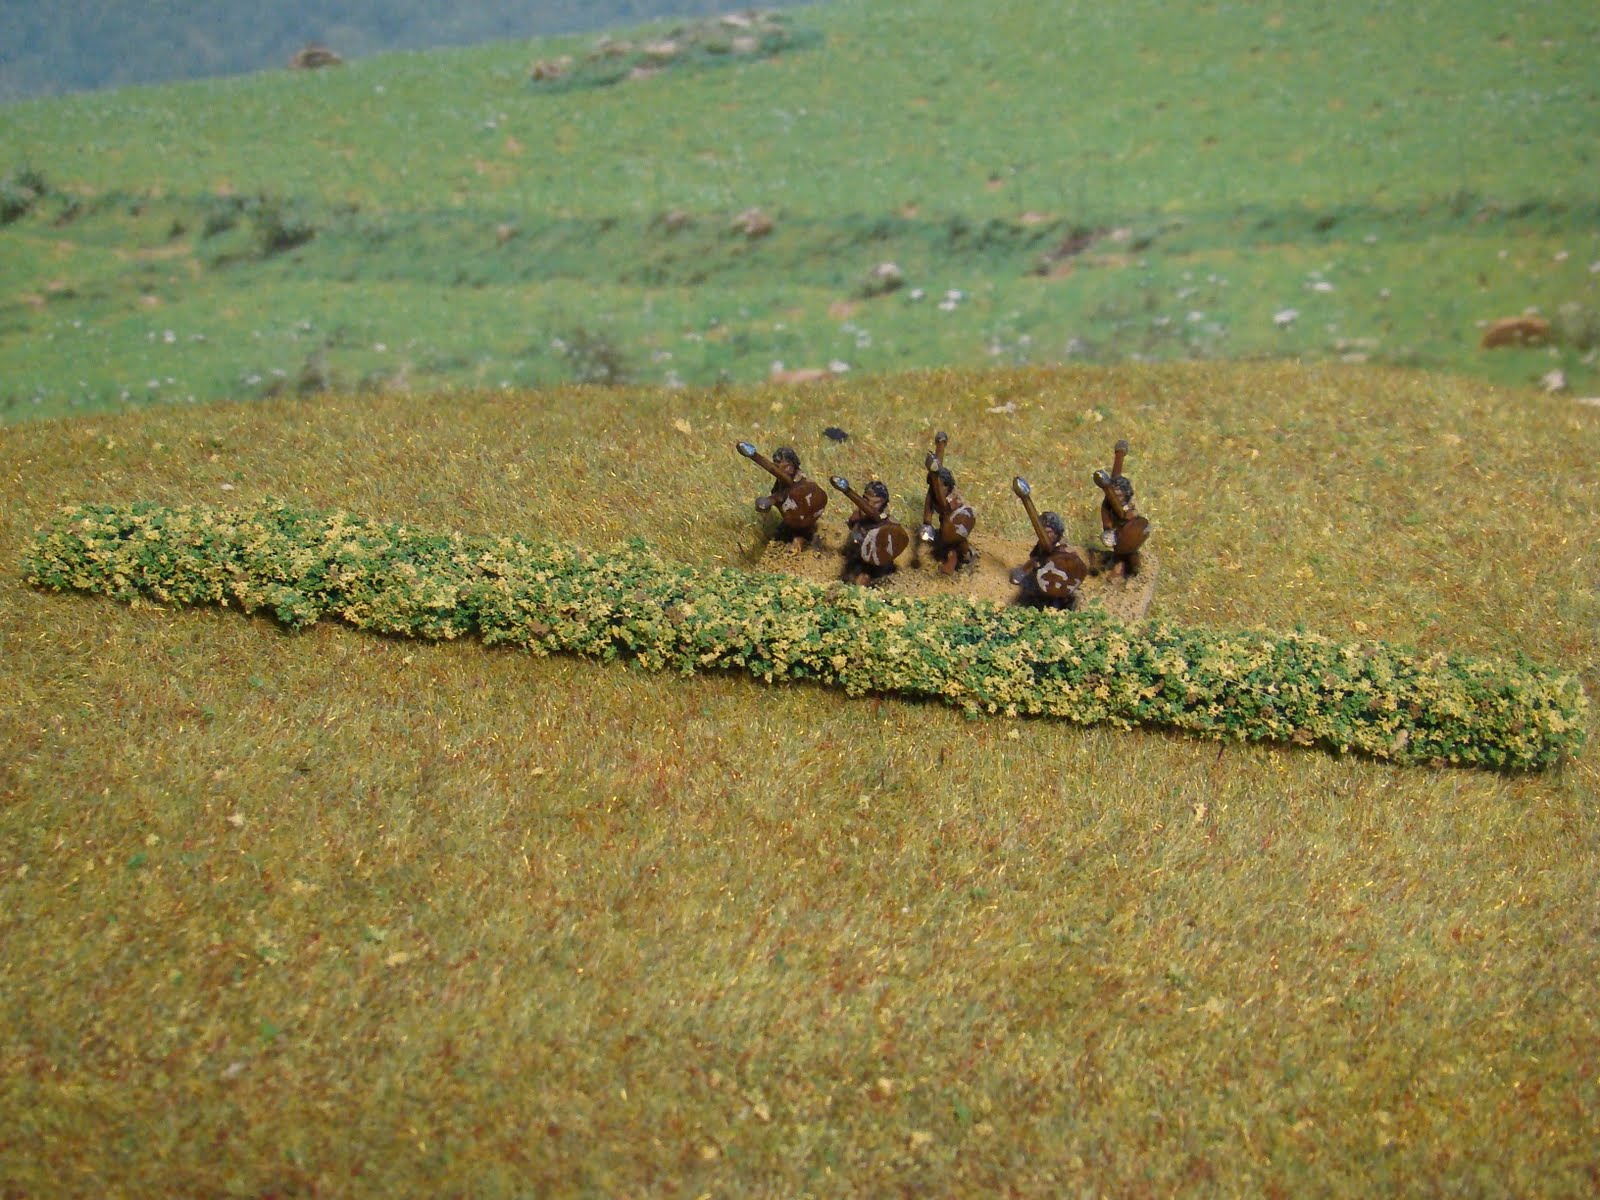
I've made a set of hedges using a household scouring pad and a bag of flock.

The scouring pad is about 8mm thick and I cut it lengthways into strips about 10mm wide, giving me a series of strips about 8x10x250mm.


I then spread some scatter grip glue from Antenociti's Workshop onto a piece of paper and dipped the scouring pad on three sides, before dipping/rolling it in flock. Scatter grip is good for this as it is VERY tacky and remains tacky after it is dry, ensuring the flock adheres to the irregular surface of the pad. You also need to dab some glue and flock onto the ends of the strip as well (but the bottom edge can be left without).

The flock I used was from AW as well, but I'm not sure they still make it. It is a mixed colour flock, predominately light green, but with some dark green and yellow mixed in. As I mentioned when describing my tree in an earlier post, when replicating nature getting layers and textures into the model is vital, and so multi shaded flock is a great cheat.

The finished hedge with some mercurial Numidian skirmishers lurking behind it!

Once dry it just needs a coat of matt varnish spray to "kill" the tackiness of the scatter grip, otherwise it is still so tacky that dust, cat hair and generally anything that can will stick to it!

Thanks for looking!

Saturday, 21 August 2010

Left handed

I've had some good news this week, my right hand is nowhere near as badly injured as the hospital first thought. The break is healing well and although a bit knackered all ligaments are present and correct. The best news is the cast is off my arm! On with the painting! Although at the moment I can only do 10-15 minutes before it hurts a bit much and I have to take a break (if you'll excuse the pun).

Meanwhile I thought I'd share a picture of what I got upto when I was restricted to painting left-handed. This is a piece of ~28mm resin terrain that I fished out of a bargain bucket at the Attack wargames show in Devizes (£1.50).


I based it dark brown and then drybrushed it progressively lighter brown and finally with a sort of grey/green colour. Its not great, but as it was done with a massive brush and one handed with my wrong hand I'll take it!

I finished it off by building up layers of flock, which is the best way of adding realism to natural scenery. I used; mixed autumn flock (antinociti's workshop), dark green clump foliage, scorched grass static grass, and finally some dead leaves (AW). Final effect is loads better than the painting alone would have been.

I've also painted up a set of three resin pyramids I bought at Attack. They are the wrong scale for warmaster, probably being 6mm, or even smaller maybe 2mm! However they were only £2 for the set and I think they are nice pieces, they can go on the edge of a desert board, or maybe even (with a bit of imagination) be the tops of pyramids almost buried in the shifting sands!


Coming up soon - Numidian skirmishers, Numidian light cavalry (both of which you can see lurking in the pyramids picture) & a very cheap warmaster hedges tutorial.

Thanks for looking!

Tuesday, 20 July 2010

Scenery Manufacturer

I've come across another resin scenery manufacturer on the web and I have to say I'm pretty impressed. Kerr & King mainly seem to make 15mm terrain but have recently added some 10mm items.

Their "desert city in a box" (pictured right) looks fantastic value at £27.50 delivered for all the buildings shown. As soon as we tick into August (and I allow myself some more wargames expenses) I'll probably be buying one to expand my 10mm collection into some urban stuff.

I recently managed to play 4 games of Warmaster Ancients with my Imperial Romans at a campaign weekend at the Devizes Attack wargames show. It was great fun and I met some other local players who were a great bunch of guys, I'll be posting a full report soon and some picture of the Carthage army that is slowly emerging from my painting desk.

Friday, 2 April 2010

Some more musings about scale

I've been thinking a bit more about the scale of 10mm wargaming over the past couple of days and I've come across a useful guide on The Miniatures Page website. This compares true scale measurements, wargaming scales and railway model scales, and so is a useful guide in understanding what non-wargames products can be pressed into service without too much bother.

10mm scale corresponds to 1/161 scale, which is almost exactly "n" gauge for model railways, so this means that n-gauge scenery can be used with no problems.

One of the things I've considered buying is more cheap wire trees and I wanted to know how big I could go with their height before it became unrealistic. - The problem with doing research into trees and rivers as a job is that I'm going to be applying an unnecessary level of detail into making sure my rivers and trees are as accurate as they can be!!

The ones I bought from Ebay the other week were 35mm, 38mm and 40mm respectively. These correspond to roughly 4.8m, 6.5m and 8m at scale. Typically this is going to correspond to young trees from the common Beech, Birch, Maple, Chestnut families, and mature Holly, Mountain Ash, Cherry, Hawthorn, and other members of the Rose family. It's worth pointing out that any coloured model trees (which are quite widely available) and represent blossoming fruit trees are going to be a bit large at anything over 50mm tall (10m), as that is about the maximum height.
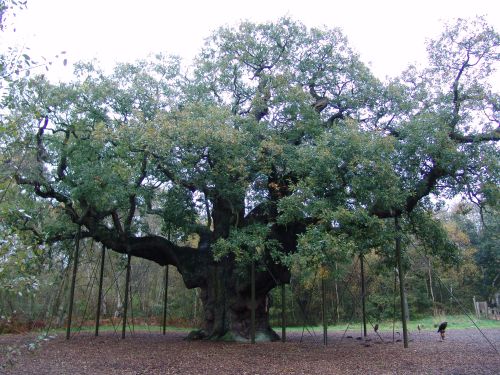
Typical mature ancient woodland would be best represented by trees that are 75mm (12m), 100mm (16m) and 150mm (24m). These sizes will correspond to typical mature trees of the Beech & Birch families, where they typically have maximum heights in the 15-25m range. Another popular tree model is the willow, where heights are about the 8-20m range depending on sub-species (40-120mm)

For pine type tress you can go a little bit larger, but the advantage of pine trees is that they don't look that different at any life stage, so there is the opportunity for people like me who play at different scales to make a scenery piece that can be used across different games. For maximum heights of Scots Pine & Douglas Fir, you are looking at 35m and 55m respectively, which is 220mm - 340mm!!

The problem with all of these facts is that a lot of wargamers have been raised on a diet of Warhammer with its oddly proportioned buildings and trees. Wargames naturally involve a lot of abstraction and I've no problem with this at all. However being used to the relative sizes of buildings and trees in Warhammer, true scaling in your 10mm games may look a little odd! For example a typical mid-size pine tree in Warhammer at scale would be around 45cm tall, the largest typical examples of Douglas Fir are going to be nearly a metre tall!! But on the table-top you are unlikely to see any trees much taller than 15cm.

For these reasons I am planning to stick to trees no taller than 10cm, as any more, although in scale, will look daft. Hopefully though this will have the advantage that my towering 16m plantations for Warmaster can be pressed into service as 5m tall arboretums for Warhammer as well.

Ultimately although 10mm wargames correspond to n-gauge model railways, you can safely use packs of HO or OO trees with no problem at all and you can even get away with nearly O gauge ones for particularly large trees.

Thursday, 1 April 2010

Appropriating Ideas

I came across a section of Old Glory's website for 10mm buildings today and although they are awfully expensive; £30 for 7 unpainted middle eastern building, £50 for a hill fort. It has given me an idea to draw "inspiration" from these pictures in making my own terrain.

I've replicated some of the pictures below to illustrate the great range of products from Old Glory - if anyone from that company feels this is an unacceptable breach of copyright please let me know.

The Buildings show are a middle eastern village (£30), an ancient hill fort (£44), which seems pretty similar to their roman marching camp (and has been presumably painting in cuprinol. And a farm set (£17). There are a variety of things along this theme and a couple of large castles as well (~£90). But for now this will do for a starting point.

I've been thinking of doing a roman marching camp for a long time, but I think I will use 1/2 toothpicks for the palisade. I just feel that the palisade would be made of either wood transported by the baggage train, or cut from the surrounding area. Either way I can't really see them sawing it into planks...

I'm thinking about buying some N-Gauge stone walls from Javis. They are not super cheap, but I think the time to make something similar would not really be worth it. and you can get 6 lengths of wall on e-bay for £4 or something.

Still on the theme of taking inspiration from elsewhere Phil B's Ancient's blog has a great article on making vines (as in wine growing) from pipecleaners and wire, so I'm going to have a go at that as soon as I can find some pipe cleaners. All in all a fair few projects beginning to stack up on my workbench and in my imagination!

It's a shame that I'm doing ancients and not medieval gaming, as otherwise I'd be spending all my money on this pretty modular castle from Kallistra...

Wednesday, 31 March 2010

Woods and Rough Ground

I've put together a couple of quick woods for my terrain collection.
They are made from a base of 3mm MDF cut to shape and sanded, they are base coated in the same matt brown emulsion/Klear mix as used for the hills and also flocked using scatter grip glue and static grass. For the wooded areas I used an autumn mix of grass, instead of summer mix so that it is darker under the trees.

The trees themselves were bought from ebay. They are n-gauge railway trees and were 99p for 10, so a decent bargain. Once the base was flocked I drilled holes into the base with a pin vice and put a dab of glue onto the base of the 'trunk' and glued them to the base. Finally a bit of clump foliage from woodland scenics was glued to the base for a bit of variety.

I also made a slightly more spare heathland piece which infantry bases and skirmishers will be able to enter, this should make for a fun piece in the game (note the wood above is deliberately too dense to get a base in)

It's made in exactly the same way, just with more clump foliage for bushes and less trees.

I'm so pleased with these pieces that I think I'm going to invest in a few more packs of these trees. A bit like a £3 t-shirt with a 'made in Bangaladesh" label inside, you are probably best not thinking about how something that is almost certainly hand-made can possibly be so cheap...

Some Hills

I've been busy making some terrain for the game.

First up I knocked out some quick hills from "pink foam". For those of you not in the know this is a fantastic material which is extruded polystyrene. In the spectrum of polystyrene it lies between expanded polystyrene and the dense grey styrene used to make wargames figures. You can buy it from (some) model shops, but you can also buy it in large packs from DIY shops. The stuff I got is Knauff Space Board insulating foam; about £15 for 4 sheets of ~4'x2' and 2" thick.

It is hard, tough and rigid. You can cut it with hot-wire tools, but also it can be sawn with a wood saw, carved with craft knifes and even sanded with sand paper. I cut the rough shape of my hills with a saw, trimmed them with a box-cutter type knife extended to the full blade length (the ones where you extend and snap off the blades), giving me a ~ 4-5" craft knife blade.

I then finally sand down the edges to make it more smoothly contoured. The best tip for these last 2 stages is to have some figures to hand and test out a) whether they actually balance on the slope, b) whether they look plausible doing it! Anything steeper than 30 degrees is probably a non-starter.

I then give my hills (or any of my foam terrain) a coat of Johnson's Klear floor varnish to harden and protect them. An undercoat of dark brown matt emulsion (from a tester pot from a DIY shop - ~£1 each), thinned with Klear. The coat(s) of Klear will prevent the foam from melting if you want to spray it (if you do it properly!), but I find the matt emulsion method quicker and cheaper.

You can then flock straight over the brown undercoat. I use some specialised terrain making supplies for this, but there is no reason why you can't do it cheaper. I sponge on "Scatter Grip" glue - a glue that dries incredibly tacky and instead of contracting as it dries and binding flock (al la PVA), it remains sticky, thus continuing to grip the flock and stopping it from becoming brittle. I firstly scatter a fine sprinkling of mixed flock over the hill and then use a "Streugras" dispenser from Noch to "puff" static grass onto the hill. This only costs about £3 and makes the grass sit up more.

Finally you can apply a coat of spray matt varnish over the top (thanks to the earlier sealing coat of Klear).